
best vpn for iphone
The best VPNs for iPhone provide robust security, an extensive network of servers, and excellent speeds. App resource usage is not an issue, thanks to leaps in hardware technology.
The best VPN for iPhone goes to ExpressVPN. It’s been in the market long enough to prove itself and goes far above and beyond traditional VPN services. There aren’t many brands who can claim the same achievements while treading the fine line between cutting-edge technology and stability.
Still, ExpressVPN isn’t alone, and it faces stiff competition. Other brands, including newer ones like Surfshark, are doing an excellent job. Regardless of your brand preference, a VPN on your iPhone is necessary, so here are five of the best to consider.
Top VPN for iPhone
- ExpressVPN – Best overall VPN For iPhone
- Surfshark – Delivers excellent value
- NordVPN – Fantastically secure VPN with wide coverage
- AtlasVPN – Young and promising VPN brand
- IPVanish – Well-established VPN
There’s a great breadth of choice in VPNs available for iPhone users. Some of the best are ExpressVPN, Surfshark, and NordVPN. These services offer dedicated iOS apps and can help protect your privacy when using your iPhone.
The best VPNs for iPhones are easy to use and allow you to connect quickly with just one tap on the screen. In addition, they provide high speeds so that your internet connection does not slow down when streaming services like Netflix or Hulu Plus.
Note
We’ve tested each extensively over long periods for speed, reliability, and overall effectiveness before making our recommendations.
1. ExpressVPN
https://www.expressvpn.com
When it comes to iPhone VPNs, ExpressVPN is also one of the best choices possible. Not only does it provide excellent security and privacy for your internet traffic, but it also has a ton of great features that make using it on your iPhone easy.
Whether traveling or at home, ExpressVPN offers many features that will help keep your phone (and data) safe, secure, and anonymous. The service encrypts all data that leaves your device, so hackers and marketers can’t see what you’re doing online.
Here are some of our favorite reasons to use ExpressVPN on iPhone:
- Stable and Fast SpeedsExpressVPN offers excellent speeds for streaming media or downloading files from the internet. The fast speeds mean you don’t have to wait long for pages to load when browsing with your iPhone. More importantly, these speeds are stable across most of its servers, so you have real choices when connecting your VPN.
- It’s Cross-platform and Easy to UseExpressVPN is extremely easy to use, and there’s no need for technical knowledge. You can install the iPhone app from the App Store and connect in just a few clicks. If you’re using a diverse ecosystem, there’s no problem at all since it provides dedicated apps for nearly all platforms.
- Lightway is an Innovative ProtocolInstead of WireGuard, ExpressVPN provides a proprietary protocol called Lightway. While they haven’t mentioned much about it, I know that it’s fast and stable at the least. ExpressVPN claims that Lightway is “built for an always-on world.”
- TrustedServer Technology Keeps You SafeThe reality is that TrustedServer is simply a fancy name ExpressVPN gives to its RAM-only servers. However, that doesn’t affect how helpful these servers are in protecting your privacy. Each time their servers reboot, all data is lost, and software gets reinstalled. It’s a foolproof defense against probing snoops.
ExpressVPN is one of the most expensive in the market. There’s no getting around this fact. The only reason this might be so is their across-the-network stable performance that not many brands can rival. Find out more at our complete ExpressVPN review.
2. Surfshark
https://surfshark.com
Surfshark is a VPN service that has been making waves in the VPN industry. It was launched on the market in 2018 and has gained much popularity since. The service offers many features, including excellent security, fast speeds, and outstanding customer support.
If you’re considering a VPN for iPhone, then Surfshark would come close to the top of my list. There are many reasons why I love Surfshark. It’s a competent service that comes at a pretty awesome price tag.
Here are other reasons you should consider Surfshark for your iPhone;
- Unlimited Device ConnectionsIn a world that’s trying to make you pay more for everything, Surfshark helps you pay less. Not only is the VPN reasonably priced, but you can connect as many devices as you want, in addition to your iPhone. In context, most VPNs restrict you to between five to eight device connections.
- Fast PerformanceSurfshark claims that its servers provide multiple 1GBps connection ports. If you use the WireGuard protocol, likely, your iPhone will never max out speeds, even on 5G networks. For now, it’s simply amazing, and you can download, upload, watch media, or do anything else without data or bandwidth restrictions.
- Great Security FeaturesSurfshark uses AES 256-bit encryption and does not log any user activity. The encryption is the same level of security used by banks and other financial institutions. Even better is their use of RAM-only servers that can wipe any residual data instantaneously.
- Supports All Major PlatformsSurfshark supports all major platforms — Windows, macOS, Android, and iOS — so you can use it with almost any device you like, not just your iPhone. The software is easy to install: just download the appropriate version of the app and follow the instructions on the screen.
The one small blooper in Surfshark’s blotter seems to be the lackluster Linux support. While it doesn’t affect the iPhone app, some cross-platform users may encounter challenges. Read more at our in-depth Surfshark review.
3. NordVPN
https://nordvpn.com
We believe NordVPN is one of the best VPN services for iPhone users. The app has a simple and easy-to-use interface and offers all the essential features you need to keep your online activity secure. Yet that’s not all it’s capable of, and many factors contribute to its high ranking.
For example, the company boasts over 5,000 servers worldwide, making it a good choice for unblocking content — even if hundreds of other users are connected simultaneously. It’s one of the earliest VPN brands I tested, and I remain a firm fan.
Here are some reasons it’s an excellent choice for iPhone users;
- NordVPN Offers Excellent PrivacyNordVPN is based in Panama and is not subject to stringent data retention laws or mandatory data sharing requirements. The company also takes customer privacy seriously, promising not to store any logs or monitor your activity while using its servers. This privacy is fundamental for any outstanding VPN service.
- Server Obfuscation CapabilitiesNordVPN’s server obfuscation feature is helpful to bypass censorship, but it also helps circumvent VPN blocks. The server obfuscation feature is essential to allow you to use the VPN even against networks designed to interrupt VPN services.
- Excellent Speed and PerformanceNordVPN offers high speeds that will enable you to stream video and play games without any lag or slowdown in performance. Plus, there are no data caps or bandwidth limits, so you can use as much data as you want without worrying about anything.
- CyberSec Protects Your iPhoneMoving past the basics, NordVPN extends protection to your iPhone with CyberSec. This feature is relatively new and helps block malicious ads, phishing sites, and malware. It’s an easy-to-use tool that you can turn on to protect yourself from harmful web content.
NordVPN prices have increased over the years in line with its better capabilities. However, given its quality, I see it as motivation to grab a subscription before the prices rise even more. NordVPN is simply one of the top choices for iPhone users in any scenario. Read our NordVPN review for more information.
4. AtlasVPN
https://atlasvpn.com
Using AtlasVPN on your mobile device has several benefits, including protecting your identity, keeping you safe from cyber threats, and unblocking websites. The only concern I had in recommending this service is that it seems to have a few teething problems.
Still, the price is shockingly low, and it’s a fantastic time to sign up before they perfect the service and prices increase. So far, they’ve been doing well and are on the move in that direction.
Here are some reasons why I recommend AtlasVPN for iPhone users;
- AtlastVPN is Extremely FastWith support for the WireGuard protocol, AtlastVPN manages to provide blazing-fast speeds. There are no fancy modifications or anything here. It’s the default WireGuard implementation with all the raw power you expect from a top-tier VPN service.
- Excellent Online PrivacyAtlastVPN implements what it calls SafeSwap servers. These servers work by swapping your IP address multiple times during your connection. While this might sound redundant, randomly swapping IPs does help to increase your digital anonymity further.
- Route Connections via Multiple ServersVPNs protect your device by routing your connection through their secure servers. AtlasVPN goes further (if you want) by doubling that number. After the first connection, data is routed to another of their VPN servers, doubling your protection.
- Connect Unlimited DevicesLike Surfshark, AtlasVPN is one of the rare brands that allow you to connect an unlimited number of devices. That means you can simultaneously use it on your iPhone, iPad, iMac, Macbook, and everything else. Why settle for less?
Again, if you use a broad range of devices, you should note that AtlastVPN won’t work on Windows 11 – for now. I do not doubt they will support it in the future, but distant water is no cure for a present thirst. Find out more at our complete AtlasVPN review.
5. IPVanish
https://ipvanish.com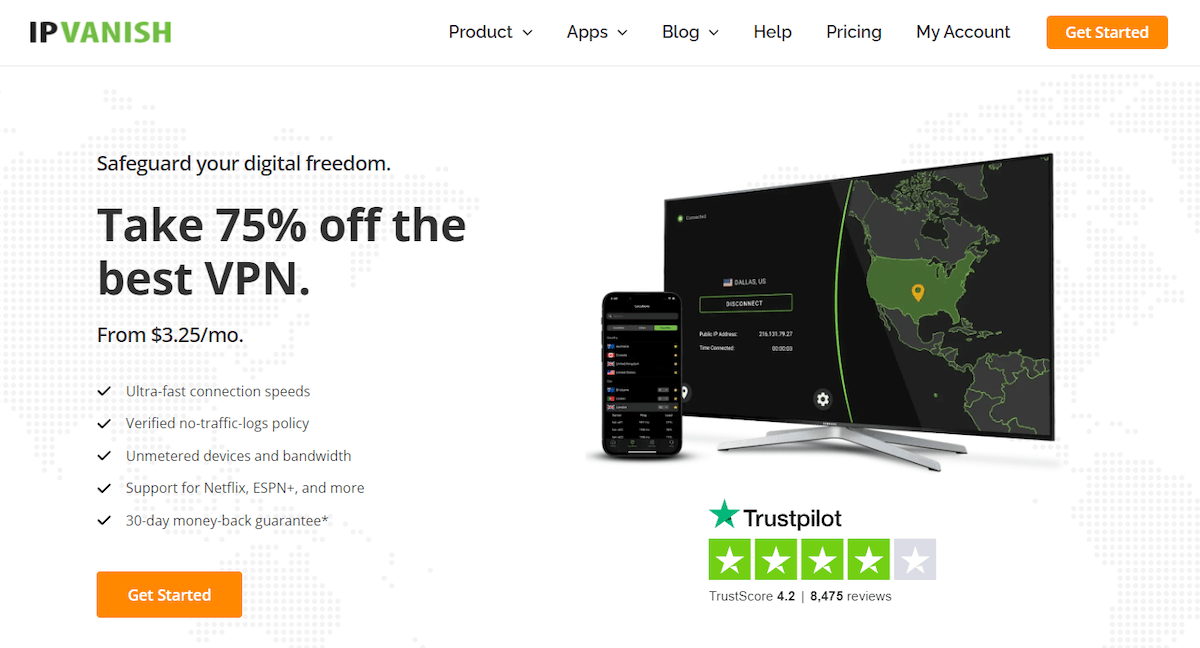
IPVanish is one of the most popular and reliable brands worldwide, so it’s worth considering when protecting your privacy online. It’s had some hiccups in the past, but under the new management has kept its nose clean.
Today, they offer an impressive service that includes a range of great features, making it perfect for anyone who wants to improve their online privacy. They’ve forged a new reputation for offering fast speeds, excellent customer service and top-tier security measures.
Here are some reasons to choose IPVanish for your iPhone:
- IPVanish is FastWireGuard has changed the landscape for many VPN services. IPVanish is one of those, and speed has improved by leaps and bounds. The company also engineers the service to provide users with the fastest speeds possible. You can expect speeds similar to what you would experience without any kind of protection in place over a WiFi connection or cellular network.
- Great Server CoverageWith IPVanish, you get access to 75 server locations. That variety is important, especially if you want to access localized content in restricted areas. It also helps with streaming services that restrict movie titles based on geographic locations. It makes life a lot easier.
- Your Data is Safer with IPVanishIPVanish uses military-grade encryption to ensure that all of your data is kept safe from prying eyes. This capability ensures that no one can access your personal information or even tell what websites you visit when using an IPVanish connection. There are also no data caps or bandwidth limits, so there is no need to worry about exceeding any restrictions.
- It’s Easy to UseThe IPVanish app for iPhone and iPad is easy to set up and use. Simply download the app from the App Store, go through the installation process, input your login credentials, and you’re ready to go. You can connect with one click by signing in with your IPVanish account.
IPVanish offers many advantages, but nothing stands too far out when compared to others on this list. It lacks the “oomph” that makes the service a must-choose, especially when better options are available. Prices are also a concern since rates hike significantly from the second year onward. Find out more at our complete IPVanish review.
Do I Really Need A VPN On My IPhone?
iPhones are one of the most popular smartphones in the world. With its many features and large screen, it’s a perfect device to stream movies and TV shows, play games, and surf the web. It’s also highly mobile so you can take it anywhere you go.
Like the rest of the world, your iPhone is susceptible to hackers, malware, and other cyber threats. A Virtual Private Network (VPN) can help protect your data from snooping. We’ve done up a whole beginner’s guide to VPN to cover this in depth, but if you aren’t sure if you need a VPN on your iPhone, here are some important reasons why;
- Protect your digital security on the go Public WiFi (and even your cellular data connection) comes with many risks. Data is often easily intercepted, meaning criminals can easily steal your passwords, IDs, or banking information. That’s where a VPN comes in handy.Running a VPN on your iPhone encrypts all your data automatically, making it useless even if someone could intercept it. It even prevents your ISP from knowing the sites you visit.
- Access blocked content anytime If you live in or travel to countries where the government or ISPs block websites, a VPN allows you to bypass these restrictions and access them freely. VPNs are also helpful in accessing blocked social media sites like Facebook or Twitter in certain countries where they’re banned.Some media streaming services like Netflix also restrict content depending on your location. A VPN can also help you bypass this – if you choose the right one. Not all VPNs will work for unblocking media streaming services. Learn more on unblocking content via a VPN.
- Improve your digital privacy In the past, the only ones who wanted to steal data were cybercriminals. Everyone wants a slice of the pie today, and even legitimate companies and websites are tracking your online activities and trying to get as much data as possible.Websites can track where you go and what you do when using a browser like Safari or Chrome on your iPhone. A VPN prevents this kind of tracking because all the information gets reputed through secure servers that control direct access to your iPhone.
What To Look For When Picking The Best iPhone VPN
One of the most common reasons people use a VPN is to protect their online privacy. A VPN will encrypt your data as it travels between your device and the internet, making it much more difficult for anyone to snoop on what you’re doing.
Yet choosing a VPN for your iPhone often goes beyond that. After all, regardless of new iPhones’ computing power, they remain mobile devices. That form factor itself limits how services might work on them.
Remember the following when choosing the Best VPN for your iPhone:
- Your VPN’s speed & performance Speed is the most crucial feature to look for when picking the best iPhone VPN. You can’t always trust a VPN’s speed claims, but if you see a discrepancy between what they advertise and what you experience, it probably means something went wrong along the way.Speed affects how fast you can stream videos, download files and play games on your iPhone (or any other mobile device). If a service doesn’t provide enough bandwidth to support these activities at high speeds, this will impact their overall performance—and your overall experience with them.We’ve run extensive speed tests with all VPNs featured in this article (make sure to check the individual reviews for the test results) and they’ve passed with flying colors.
- Connection protocols VPNs used to be somewhat slower on mobile devices due to the older protocols available. Today that’s out the window, thanks to WireGuard. However, it does mean that you must ensure that your VPN pick for iPhone supports this new protocol.WireGuard is fast, lightweight, and runs on iPhones, giving you all the speed you need. And that’s regardless of where you’re on a data connection or WiFi.
- Free vs. paid VPNs The best VPNs offer a wide range of features and services without breaking your bank. Free VPNs can be helpful for occasional use, but they tend to have limited features and can sometimes even pose a danger to your data. Expect to pay somewhere between $3 to $5/mo for a reputable VPN brand.Some free VPNs offer a paid service you can upgrade to, but these are often much more expensive than typical. Avoid the “upgrade trap” and sign on with a commercial option right from the start. They mostly come with money-back guarantees anyway.
- Battery drain Battery drain is a serious concern regarding VPNs and their effect on your phone’s battery life. This phenomenon is especially true if you want to use your iPhone all day long, which is why so many people are looking for ways to minimize the amount of power their VPN uses.To determine which VPN will be best for you, test it out by using it without a power bank or wall socket nearby. If you feel the drain is excessive, see if any optimizations are available for your iPhone and the VPN app.
- Platform support Platform support is an important factor many forget about when choosing a VPN for iPhone. Remember that you can use a VPN with multiple devices. For example, you can use the same VPN subscription on your iPhone, Mac, Windows laptop, or even FireTV with Private Internet Access VPN.The key here is to broaden your mindset at the beginning so you don’t end up paying for a VPN that’s too limited in scope. All the VPNs on the list above support multiple platforms and can handle most use-cases.
How To Get Started Using A VPN On IOS
Running a VPN on your iOS device (iPhone or iPad) is straightforward and can be done in a few simple steps.
- Sign up for a VPN service.
- Download the VPN app from the App Store.
- Install and launch the app, then sign in to your account.
- Select a server and click connect.
And that’s it! The VPN will now protect your device and data.
Does VPN Slow Down Your Internet Connection?
There is a misconception that VPNs will slow down your Internet connection. However, this is not an accurate statement. Many things affect VPN performance, and the part that impacts you will likely be latency.
Latency is the time taken for data to travel over a distance. If the VPN server you choose is far from your physical location, your speed will be lower than a connection with a nearby server. For example:
Assuming your physical location is in New York, a VPN connection to a server in Seattle will be faster than connecting to a server in Japan. The reason is that your data takes longer to transit the extra few thousand miles to the Japan server and back.
Final Thoughts On The Best VPN For IPhone
Here’s the recap of our best VPN for iPhone:
| ExpressVPN | Surfshark | NordVPN | AtlasVPN | IPVanish | |
|---|---|---|---|---|---|
| Connection speed | Excellent | Excellent | Excellent | Excellent | Very Good |
| Simultaneous connection | 5 | Unlimited | 6 | Unlimited | Unlimited |
| VPN server | 500 | 3,2 | 5 | 700 | 1,9 |
| Overall Rating | 5/5 | 5/5 | 5/5 | 4/5 | 4/5 |
| Starting price /mo | $6.67 | $2.21 | $4.99 | $3.29 | $3.33 |
| See all features |
It’s a buyer’s market with many excellent VPN options today. Thanks to WireGuard, performance barriers are out the window. I firmly believe that ExpressVPN offers the best service at its price class for iPhone users. However, if you prefer one of the other VPN brands on the list above, there’s no harm.
When making your choice, remember that it’s not always about the VPN and your iPhone. Even if you only use it on that platform, you can share the VPN with a family member who might be on Android.