
Setting up a WooCommerce store is a popular route taken by entrepreneurs who want to tap into eCommerce using the WordPress platform. This article outlines 11 steps to launch a successful online store using the WordPress plugin WooCommerce.
We cover all the essential steps from installing WordPress and WooCommerce on your web hosting to configuring your store settings and testing user experience. The only prerequisite is that you have already registered a domain name. Let’s go!
1. Install WordPress
The first step to set up a WooCommerce store is to install the WordPress Content Management System (CMS). Keep in mind that both WordPress and WooCommerce come pre-installed if you opt for managed WooCommerce hosting. Managed WordPress hosting services also have WordPress pre-installed.
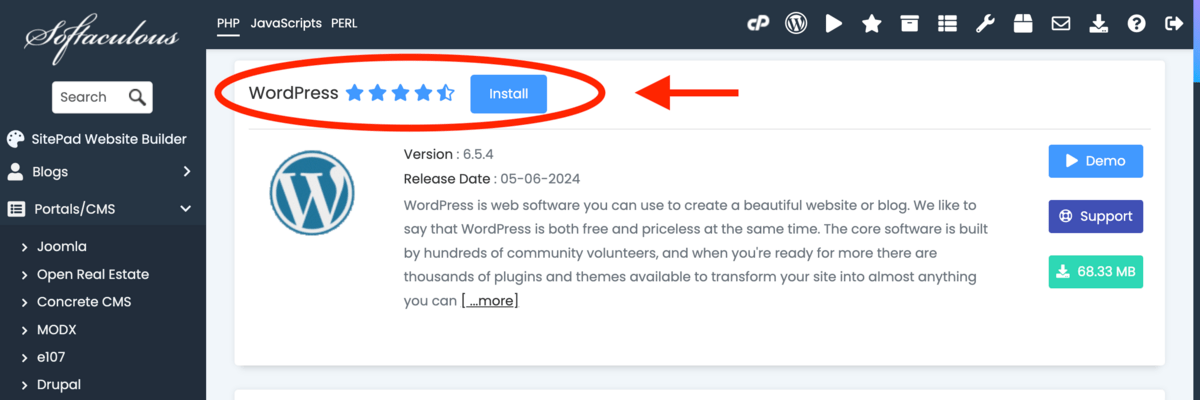
Those not on a managed hosting plan need to install WordPress in one of two ways, depending on your hosting environment. Those using a client portal or a custom control panel follow a guided installation process. Those with access to cPanel utilize the Softaculous App Installer for a straightforward WordPress setup.
After successfully installing WordPress, navigate to Settings > General in your dashboard. Ensure that the box “Discourage search engines from indexing this site” is ticked. This requests search engines to refrain from indexing your in-progress WooCommerce store and keeps it hidden from public view until it is fully developed and ready to launch.
2. Install the WooCommerce Plugin
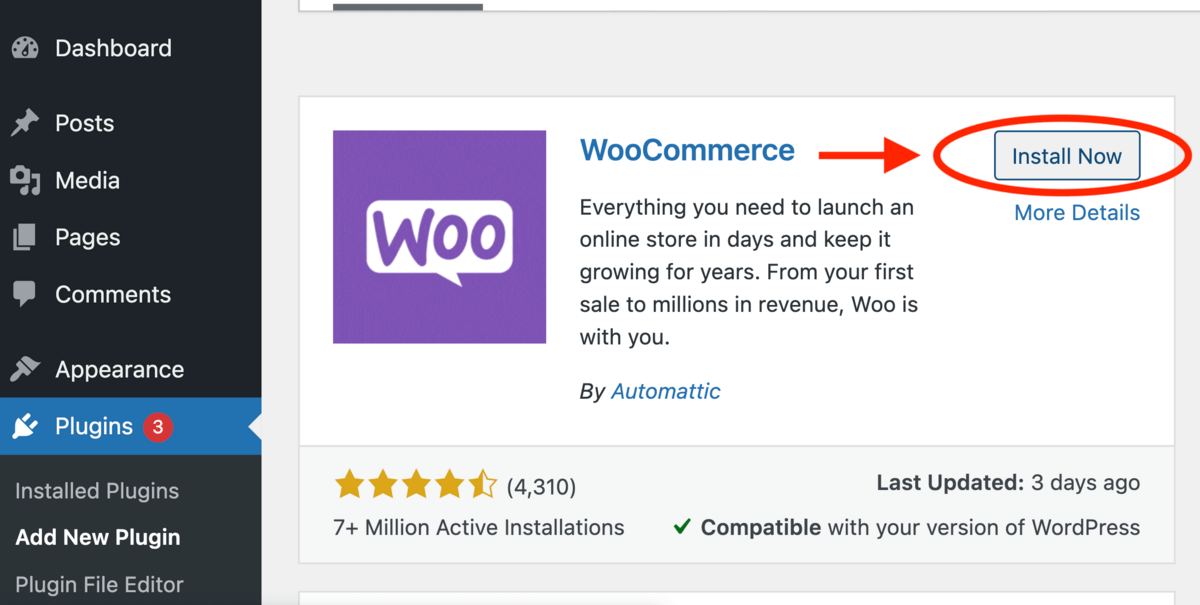
The second step is to install the WooCommerce plugin. This action is necessary to integrate eCommerce functionality into your WordPress site.
Navigate to the “Plugins” section in your WordPress dashboard and use the search bar to find “WooCommerce.” Once located, click “Install” and then “Activate” to enable the WooCommerce plugin on your site.
3. Set up WooCommerce
The third step is to set up WooCommerce. Initiate the setup process by navigating through WooCommerce’s straightforward setup wizard which takes 3 steps.
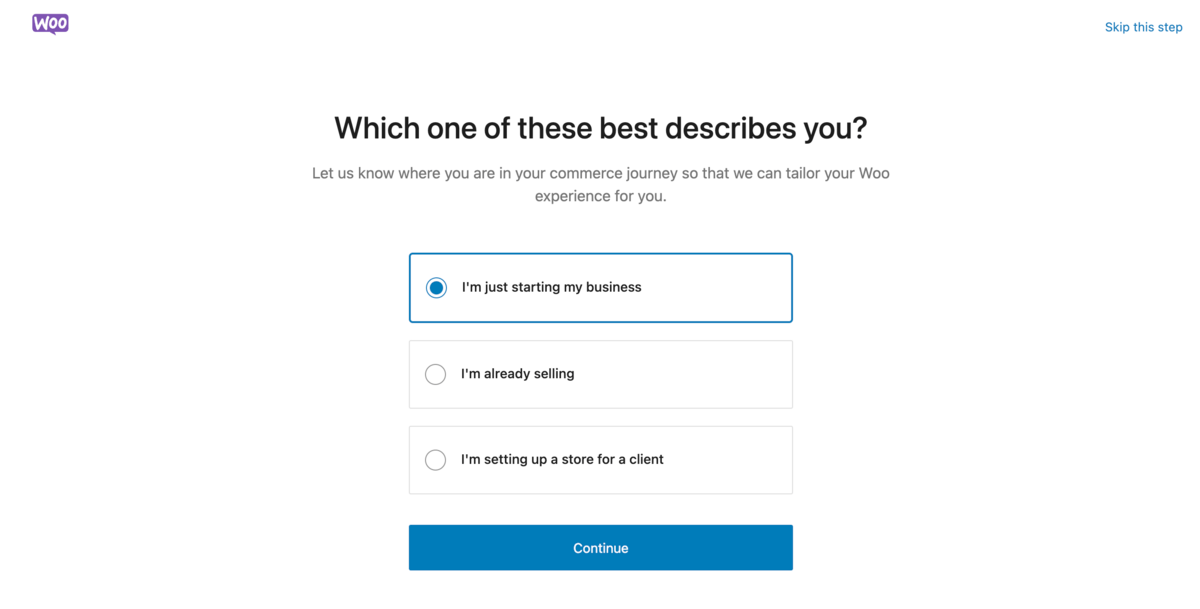
The first step is to define your eCommerce journey for your WooCommerce store. It involves answering whether you’re just starting your business, already selling, or setting up a store for a client. This helps WooCommerce personalize your experience accordingly.
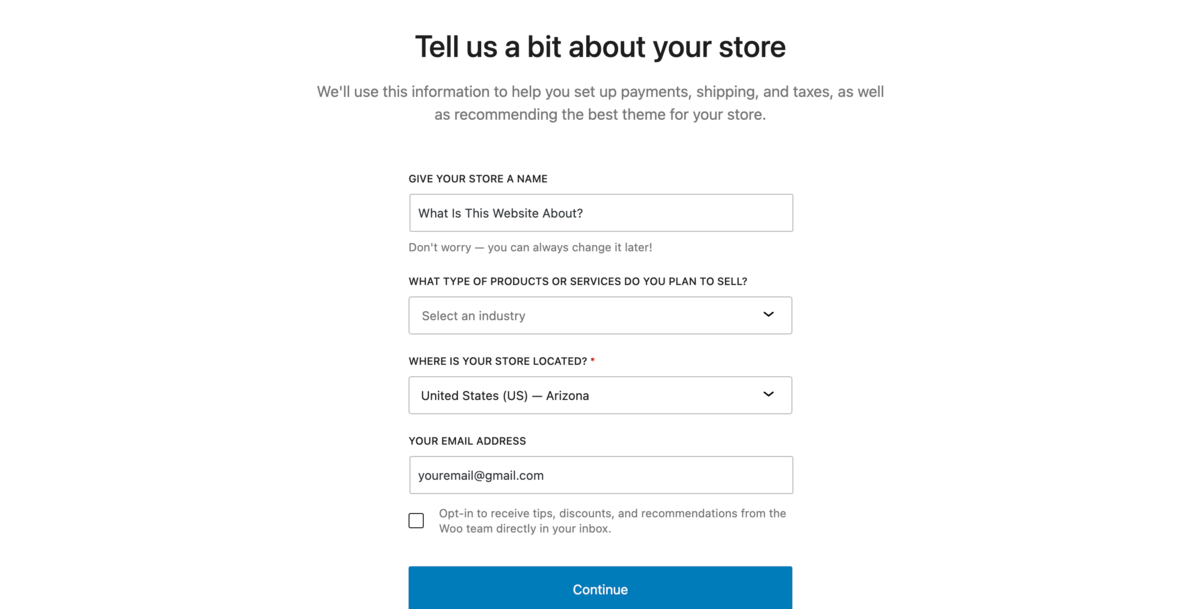
The second step is to provide essential details about your store, including the name of your store, the type of products or services you plan to sell, your store’s physical location and your contact email address.
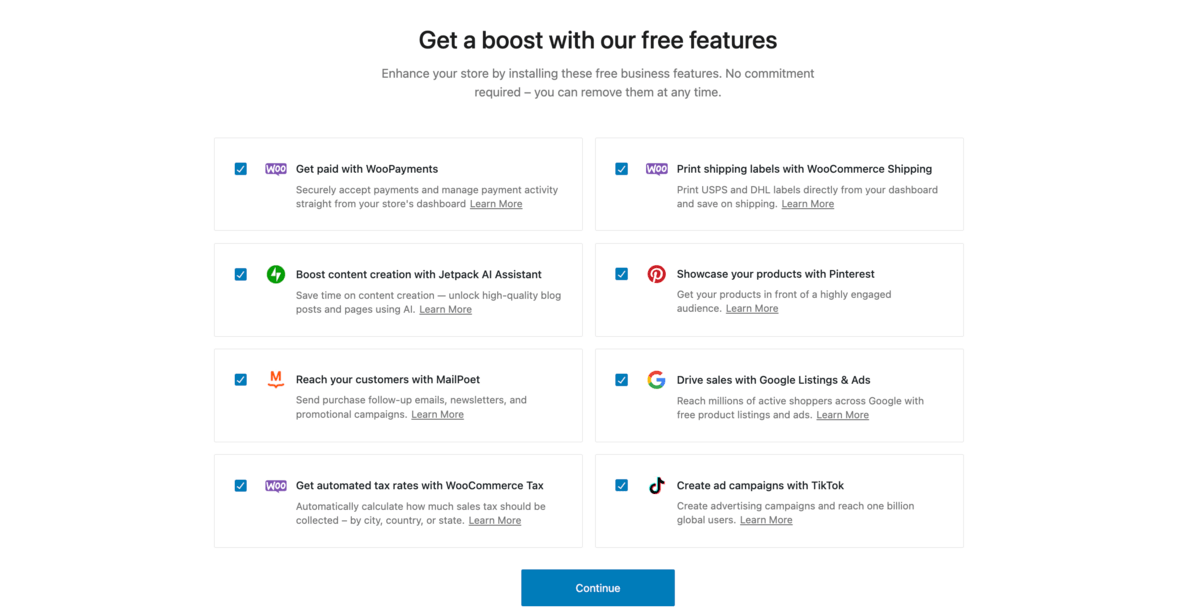
The third step is to select from a list of free features to enhance your WooCommerce store. These eight plugins extend the functionality of your store in different ways. Firstly, WooPayments simplifies payment processing directly within your store. Secondly, WooCommerce Shipping provides access to shipping solutions and discounts. Thirdly, Jetpack enhances site security, performance, and management. Fourthly, Pinterest for WooCommerce integrates your store with Pinterest to reach more customers. Fifthly, MailPoet allows you to implement email marketing directly from your WordPress dashboard. Sixthly, Google Listing & Ads promotes your products on Google. Seventhly, WooCommerce Tax automates tax calculations and reporting. Lastly, TikTok allows you to expand your global reach via social media ad campaigns.
4. Add Products or Services
The fourth step is to add products or services. Click on “Add Products” found within the setup checklist on your WooCommerce dashboard.
Adding each product or service requires you to enter these 6 details:
Product Name
Enter the title of your product or service.
Product Data
Input relevant details such as prices, SKU (Stock Keeping Unit), weight, dimensions, available colors, and more.
Product Description
Provide a comprehensive description of your product or service that highlights key features and benefits.
Product Short Description
Summarize the key selling points of your product or service for quick reference.
Product Images
Upload high-quality images that accurately represent your product or service.
Product Tag and Categories
Assign tags and categories to your product or service.
Once all relevant information is filled in and checked for accuracy, click “Publish” to make your product or service live on your WooCommerce store.
5. Install a Theme
The fifth step is to install a theme. A “theme” in the context of WordPress and WooCommerce refers to a collection of design elements and code that dictate the visual presentation and layout of your website. It encompasses color schemes, font styles, page layouts, and widget positions.
For WooCommerce-ready (a.k.a. WooCommerce-optimized) themes, navigate to “WooCommerce” > “Extensions” in your dashboard. These are premium themes with prices ranging from $70 to $100 annually. They integrate seamlessly with WooCommerce and are tailored for online stores.
For free themes, go to “Appearance” > “Themes,” then click on “Add New Theme.” Use the filter options to find a theme that suits your store’s needs.Free themes offer a cost-effective way to start your online store, though they lack advanced features and customizations.
To customize with a drag-and-drop builder plugin, visit “Plugins” > “Add New Plugin” in your WordPress dashboard. Search for popular builder plugins such as Elementor, Beaver Builder, Otter Blocks, or SeedProd. Install and activate the plugin of your choice to start personalizing your WooCommerce store with ease.
6. Set up WooPayments
The sixth step is to set up WooPayments. WooPayments is a payment solution tailored for WooCommerce stores that facilitates various payment methods like credit and debit cards, Apple Pay, Google Pay, and express checkout options. This solution supports international transactions in over 135 currencies across 38 countries. It also offers contactless in-person payment capabilities through Tap to Pay on iPhone.
7. Set up WooCommerce Tax
The seventh step is to set up WooCommerce Tax. WooCommerce Tax is a service designed to automatically calculate the sales tax to be collected at checkout, based on the store’s location settings within WooCommerce. This simplifies the tax collection process for store owners as they no longer need to manually manage sales taxes. WooCommerce Tax is available in several countries, including the United States (US), Canada, Australia, and the United Kingdom (UK).
8. Set up WooCommerce Shipping
The eighth step is to set up WooCommerce Shipping. WooCommerce Shipping is a feature directly integrated into the WooCommerce dashboard to streamline shipping processes. WooCommerce Shipping enables access to discounted rates for USPS and DHL Express, and allows both domestic and international label printing directly from your dashboard. This feature is particularly beneficial for U.S.-based stores, as it offers significant postage savings and operational efficiency.
9. Configure Your WooCommerce Store Settings
The ninth step is to configure your WooCommerce store settings. Navigate to WooCommerce > Settings and review nine areas: General, Products, Shipping, Payments, Accounts & Privacy, Emails, Integration, Advanced, and Multi-currency.
We recommend focusing on 4 key settings:
General
Use the General area to set your store address, currency options, and enable tax calculations if applicable.
Products
Use the Product area to choose between metric or imperial units, and enable product reviews and ratings.
Shipping
Use the Shipping area to create specific shipping zones not just by location but also by product type or weight.
Payments
Use the Payment area to select convenient payment methods like WooPayments for cards, direct bank transfer, check payments, and cash on delivery.
Ensure each area is tailored to your store’s needs for optimal operation.
10. Test and Review Your WooCommerce Store
The tenth step is to test and review your WooCommerce store. Firstly, you need to examine the user journey across different devices and browsers. Focus on testing navigation, browsing, and checkout processes to ensure a seamless experience on every platform. Secondly, simulate order processing and fulfillment to check the efficiency and accuracy of transactions, confirmations, and delivery systems. Lastly, confirm the installation and functionality of your SSL (Secure Sockets Layer) certificate to secure your website and protect customer data. An SSL certificate is a tool that encrypts data transfer.
11. Launch Your WooCommerce Store
The eleventh and final step is to launch your WooCommerce store. To launch your WooCommerce store, go to your WordPress dashboard, navigate to Settings > Reading, and uncheck the option “Discourage search engines from indexing this site.” This action signals search engines to start indexing your site. It’s now discoverable to the public and marks the official launch of your online store.
What Is a WooCommerce Store?
A WooCommerce store is an online storefront created using the WooCommerce plugin for WordPress. The WooCommerce plugin provides webmasters with essential tools for inventory management, order processing, payments, and shipping. WooCommerce stores are customizable and scalable, which makes them suitable for businesses of all sizes. Building a WooCommerce store therefore involves the same process as building a WordPress website with the additional step of installing the WooCommerce plug-in afterwards.
What Is WooCommerce?
WooCommerce is a free, open-source eCommerce plugin designed for WordPress. It was launched in 2011 by WooThemes then acquired by Automattic (the company behind WordPress) in 2015. WooCommerce allows users to turn their WordPress sites into customizable eCommerce stores. Users are able to manage inventory, process orders, handle shipping, and conduct secure payments all in one platform.
Is the WooCommerce Plugin Free to Use?
Yes, the WooCommerce plugin is free to use. It provides essential eCommerce features such as WooPayments, WooCommerce Tax and WooCommerce Shipping at no extra upfront cost.
What Do I Need to Create a WooCommerce Store?
You need 3 core elements to create a WooCommerce store: a domain name, web hosting, and WordPress installed on your hosting account. A domain name serves as your unique web address (URL). It’s what customers use to find your shop on the internet. Web hosting is a service that provides the technology and server space necessary for your website to be accessed on the Internet. WordPress is a content management system (CMS) that allows you to create and manage your website through a user-friendly interface. WordPress is the foundation upon which WooCommerce, as a plugin, operates to add eCommerce functionality.
These 3 elements serve as the foundation for setting up and running a WooCommerce store, as they allow you to build and manage your online business.
What Hosting Plan Is Recommended for WooCommerce Stores?
WooCommerce hosting plans are recommended for WooCommerce stores. This specialized hosting provides optimized server configurations to enhance the performance, security, and scalability of online shops powered by WooCommerce. Providers like Hostinger, TMD Hosting, GreenGeeks and SiteGround offer tailored WooCommerce hosting solutions. Many of these recommended hosts for WooCommerce also offer important services for eCommerce operations such as daily backups, caching for faster loading and marketing credits.
Can I Create a WooCommerce Store Without WordPress?
No, you cannot create a WooCommerce store without WordPress. WooCommerce is specifically designed as an eCommerce plugin for WordPress. This means it relies on WordPress as its platform. To use WooCommerce, you must have a WordPress website where the plugin can be installed and activated.
How Much Does It Cost to Start a WooCommerce Store?
The cost of starting a WooCommerce store ranges from $8,000 to $25,000 annually. Costs include:
Domain Name
A domain name costs between $0.70 to $14 annually. Renewal costs between $10 to $14 annually.
Hosting Service
WooCommerce cloud hosting costs between $120 – $1800 annually.
Paid Components
Free themes are available, but premium themes that offer more customization and features cost up to $1,100. Plugins for added functionalities like contact forms, SEO, and security are free for basic versions, but their premium counterparts with extensive features range from $49 to $1,000 annually.
Inventory Costs
Inventory costs are a highly variable expense that ranges from $500 to $10,000 for SMEs. The only exception is if you opt for a dropshipping business model, where the supplier holds the inventory and ships products directly to customers, eliminating the need for upfront inventory investment.
SSL Certificate
SSL certificates for WooCommerce typically cost between $0 to $3,480. They’re an important indicator of trustworthiness. Paid options must be renewed yearly.
What WooCommerce Extensions Are Useful for Starting a WooCommerce Store?
WooCommerce extensions are useful add-ons that enhance the functionality of WooCommerce stores. They offer features for payment gateways, shipping methods, subscription services, and more. 4 useful WooCommerce extensions for starting a store include:
Payment Extensions
Stripe, PayPal, and Square offer unique features such as direct integration with major eCommerce platforms, extensive global payment options, and advanced fraud protection.
Shipping Extensions
ShipStation and Shippo stand out for shipping with automated order fulfillment, multi-carrier rate comparison, and batch label printing to simplify logistics.
Woo Subscriptions
Woo Subscriptions enables easy management of recurring payments and subscription models. This improves customer retention long-term.
Shipment Tracking by WooCommerce
Shipment Tracking improves customer service by providing timely and accurate delivery updates directly within the WooCommerce dashboard.