
Moving a WordPress site from one web host to another used to be a nightmare. Especially if you had little or no technical knowledge.
But migrating WordPress sites just got a little easier thanks to a plugin called Duplicator.
In this post, I’ll take you through the step-by-step process of moving your website from one server to another seamlessly.
table of contents
- Choose A New Web Host
- Download And Install The Duplicator Plugin
- Create A New ‘Package’
- Scanning In Progress…
- Click ‘Build’
- Download BOTH Packages
- Point Your Domain Name To Your New Server
- Log In To Your New Web Host cPanel
- Create A New Database
- Enter A Database Name And Your Details
- Give Your User Full Privileges
- Upload The ‘Duplicator’ Files To Your New Server
- Install Your WordPress Site
- Enter The Database Details
- Test The Connection
- Run Deployment
- Check It’s All Working Correctly!
In a nutshell, we’ll be doing the following:
- Backing up and exporting your current WordPress database and files (i.e. all the content, themes, plugins etc.)
- Creating a new database on your new web host.
- Uploading and installing your old WordPress files onto the new host.
1. Choose A New Web Host
First of all, you need a new home! Ask yourself, why are you looking to migrate your site? Is your current web host too expensive? Too slow or unreliable? Too many restrictions?
Think about what features you want in a web host and choose the right one for you. (You don’t want to migrate it more than once!)
To help yourself make the right choice, see our best WordPress hosting providers listicle.
Tip
Some web hosts now offer a free migration service. If you choose that option, you can skip all the technical steps in this article and let the web host do the work for you.
2. Download And Install The Duplicator Plugin
You’ll find the Duplicator plugin at the usual WordPress plugins page. It’s a straightforward backup plugin which allows you to backup and export your entire WordPress site.
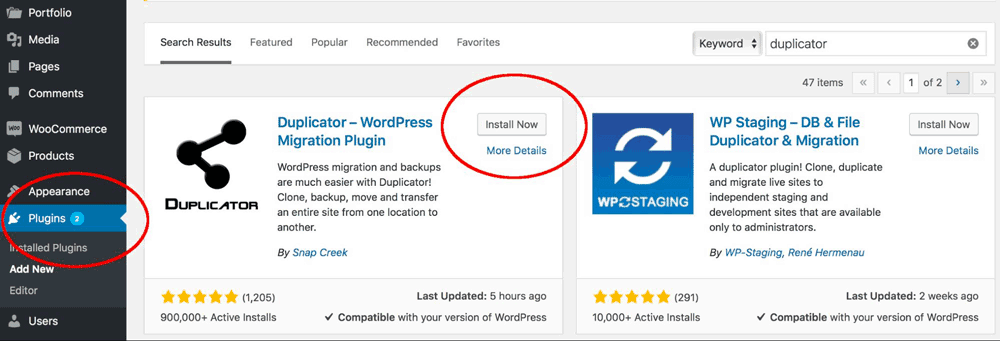
There are other plugins that will do a similar thing (like Backup Buddy). But I’m using Duplicator because it’s free and the re-upload at the other end is super simple. Visit the WordPress plugin page and search ‘Duplicator.’ Then, Install it and activate the plugin.
3. Create A New ‘Package’
The ‘package’ is essentially one giant backup of your site. We’ll then export that package.
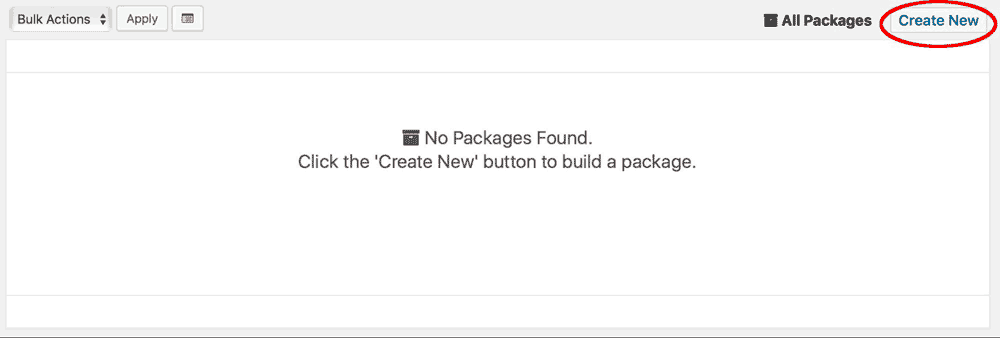
Create a name for your package, and skip down to the ‘Next’ button. (You don’t need to change anything in the ‘Archive’ section and we’ll fill out the ‘Installer’ details later).
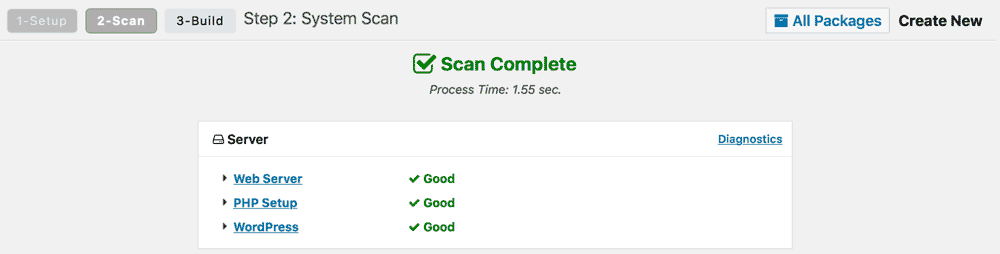
4. Scanning In Progress…
The plugin will now scan your files and database. You may get a couple of warning signs if you have large files on your website. You can either remove these, or proceed anyway.
5. Click ‘Build’
When the scan is complete, click ‘build’, which will create your package. It may take several minutes to package up your website, depending on how large it is.
6. Download BOTH Packages
You’ll now see two buttons: “Installer” and “Archive”.
Click both of these buttons to download them. You’ll need both files later on. (It is also advisable that you store a copy of these backups at an offsite location like a cloud storage service.)
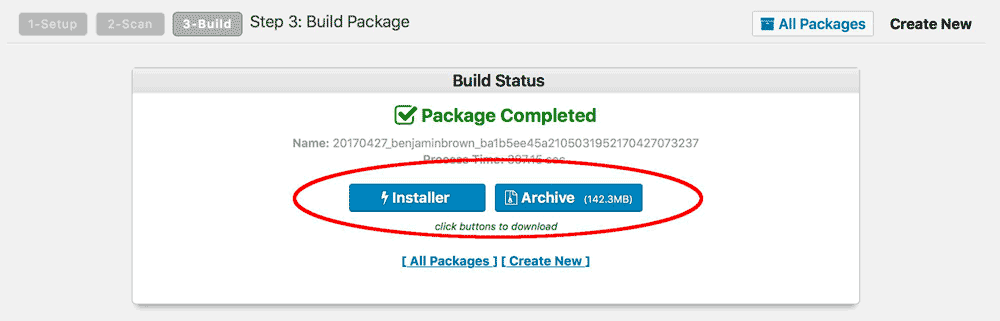
You’re now backed up!
That’s phase one complete. You’ve backed up and exported your WordPress website. Now we need to move across to your new host and get things set up.
7. Point Your Domain Name To Your New Server
If you’re keeping the same domain name, you’ll need to point your domain to your new web host.
Simply log in to your domain provider (whether it’s GoDaddy, 123-Reg etc.). Then navigate to the DNS (domain name servers) options.
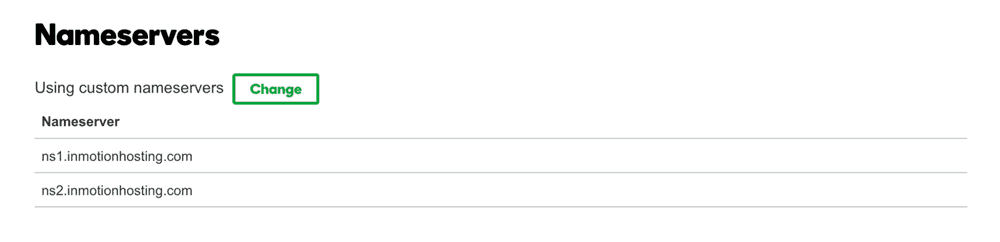
Change them so they point to your new web host.
Your new host will tell you the DNS server address (it’s usually something like ns1.inmotionhosting.com).
Note
It can take up to 24 hours for this change to happen.
8. Log In To Your New Web Host cPanel
Access the control panel of your new web host. This is where we’ll create a new database and upload the necessary files.
9. Create A New Database
Don’t be tempted to hit the ‘install WordPress’ button. Go straight to creating a database.
This process may vary depending on your chosen web host. But you’re looking for the MySQL Database Wizard option, which will look something like this:

(If you can’t find it, look at your web host’s ‘support’ section. They’ll explain how to create a database.)
10. Enter A Database Name And Your Details
This step is super important.
Give your new database a name.
Then enter a username and password.
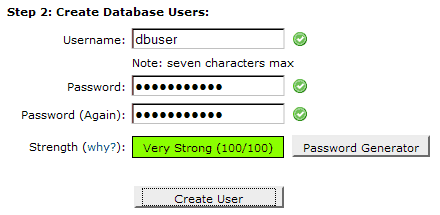
WRITE THESE DETAILS DOWN. You will need them later.
11. Give Your User Full Privileges
You’ll be asked to check a box to give the user full privileges. Check the box.
Your new database is set up!
Great, so your WordPress site is backed up and exported. Your new web host is primed and ready. All that’s left to do is import and install the website onto your new host.
12. Upload The ‘Duplicator’ Files To Your New Server
Remember the ‘Installer’ and the ‘Archive’ files we downloaded in Step 6? It’s time to find them and upload them to your new server.
You can do this on your new host’s cPanel under ‘File Manager.’ (You can also use an FTP client like Firezilla if you prefer).
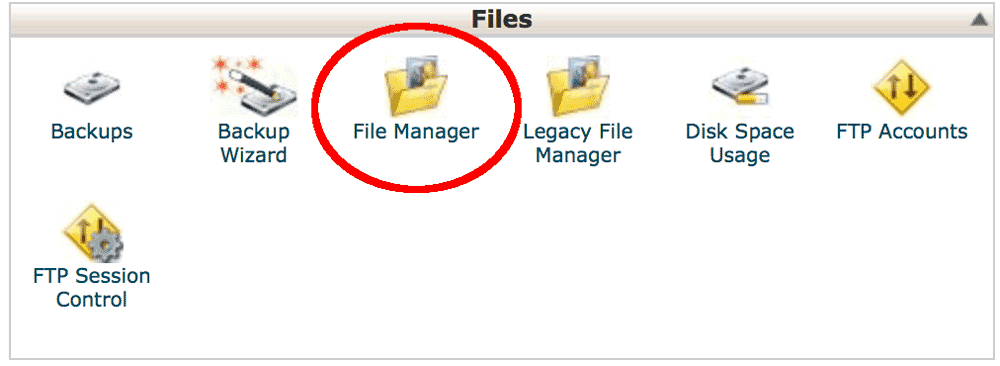
Again, all web hosts are different, but you typically want to upload them to the “public_html” location.
13. Install Your WordPress Site
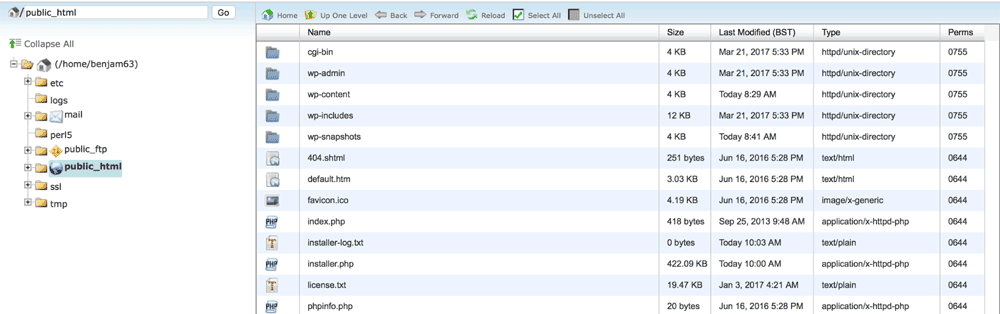
With your website files now uploaded to your server, it’s time to install them.
To do this, you need to access the installer file you just uploaded. Typically, you can do this in your browser at this address:
http://www.your-website.com/installer.php.
This should now bring up a page that looks like this:
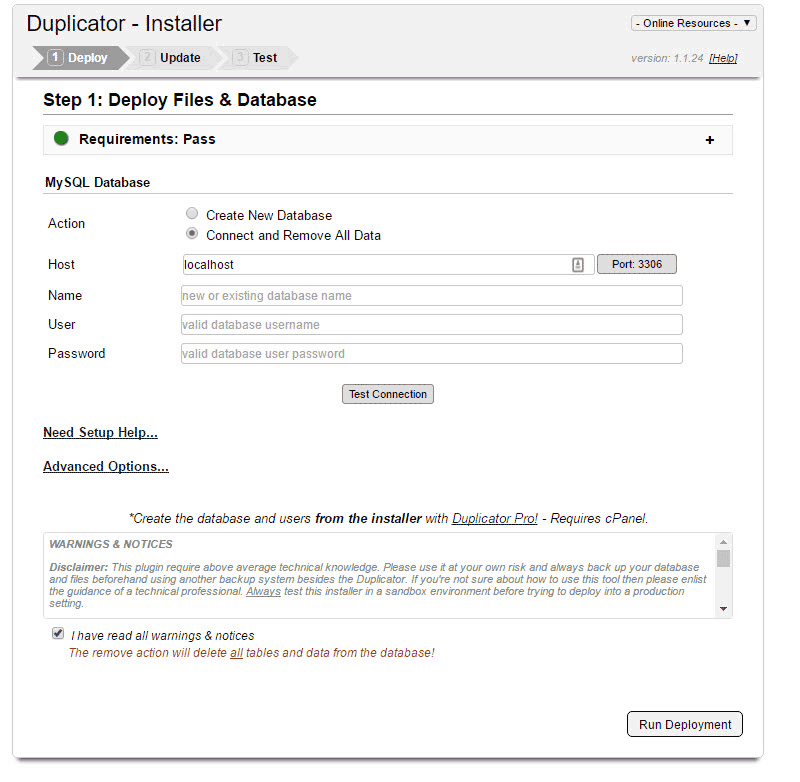
14. Enter The Database Details
Remember the database details we created in Step 10? (The database name, username and password).
This is where you now input those details.
15. Test The Connection
If everything goes to plan, there will be no errors when you click ‘Test Connection.’
BUT, if any errors show up, check out the ‘common connection issues’ which should clear it up.
16. Run Deployment
You’re home and dry! The installer will now deploy your website to your new server. This may take a few minutes, depending on the size of the upload.
You can now log into WordPress with your usual details. All your content, themes and plugins will be exactly as you left them.
17. Check It’s All Working Correctly!
You have now successfully migrated your WordPress site from one host to another. You may notice that some plugins are acting strangely; that’s normal, just reinstall them.
Lastly, check each page of your website to make sure nothing has gone wrong in the migration.
Final Thoughts
Migrating a WordPress website using this method does still require a little tech know-how. However, using the Duplicator plugin, it’s much easier than it was in the past.
Do check out our WordPress site management guide for more tips and tricks.